Elevate Your Canvas Art: A Step-by-Step Guide to Installing it in a Floater Frame
September 06, 2023
Canvas art has a unique ability to transform any space. Its texture and depth bring life to your favorite memories and artistic expressions. One way to enhance the presentation of canvas art is by framing it in a floater frame. This not only adds a professional touch but also protects the canvas. In this guide, we'll walk you through installing your canvas art into a floater frame using countersink pilot holes, spacers, and screws for a flawless finish.
Watch our video tutorial or follow the step-by-step instructions below to frame your canvas art in a floater frame like a pro!
Supplies
Before you begin, make sure you have the following materials ready:
Canvas Art
Floater Frame
Drill
Countersink Drill Bit
Screwdriver Drill Bit
Spacers (plastic or cardboard)
Screws
Step 1: Measure and Mark
Start by measuring your canvas art and the floater frame to ensure a perfect fit. Use a measuring tape and a pencil to mark where the screws will go along the back of your floater frame. Maintaining uniform spacing around the frame is essential for a balanced look. The larger your canvas art and frame is, the more screws you'll want to use to secure your art into the frame.
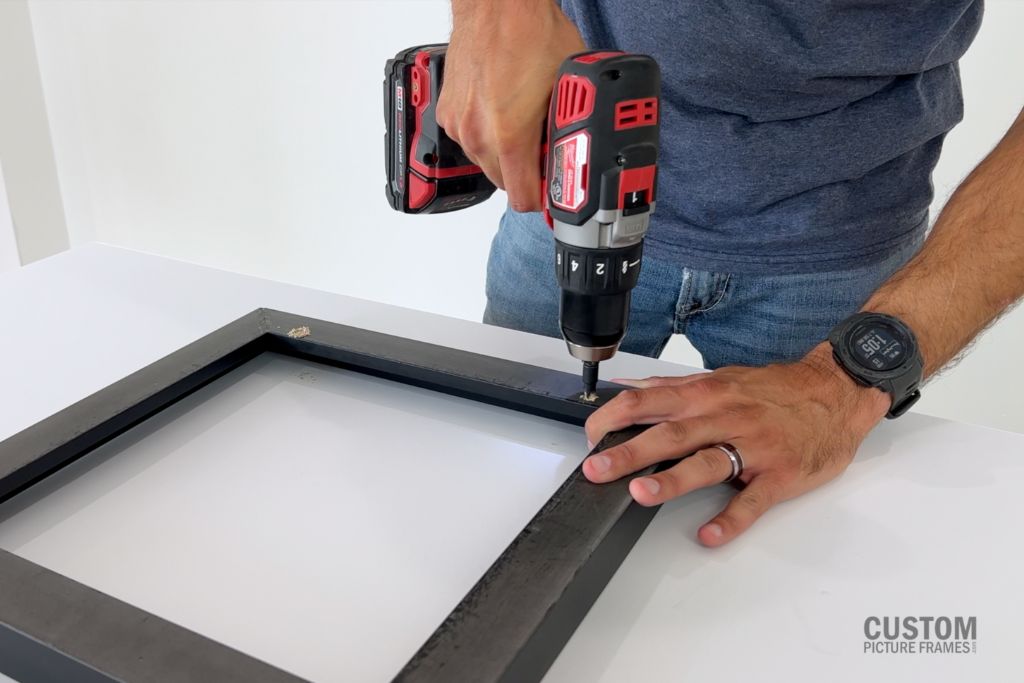
Step 2: Create Countersink Pilot Holes
To make sure the screws sit flush with the frame, you'll need to create countersink pilot holes. Attach a countersink drill bit to your drill. Position it over each marked spot and drill gently. Be cautious not to drill too deep; the goal is to create a slight indentation for the screw heads. While this isn't necessary, it does create a more professional finish and keeps the screws from damaging the wall behind your frame.
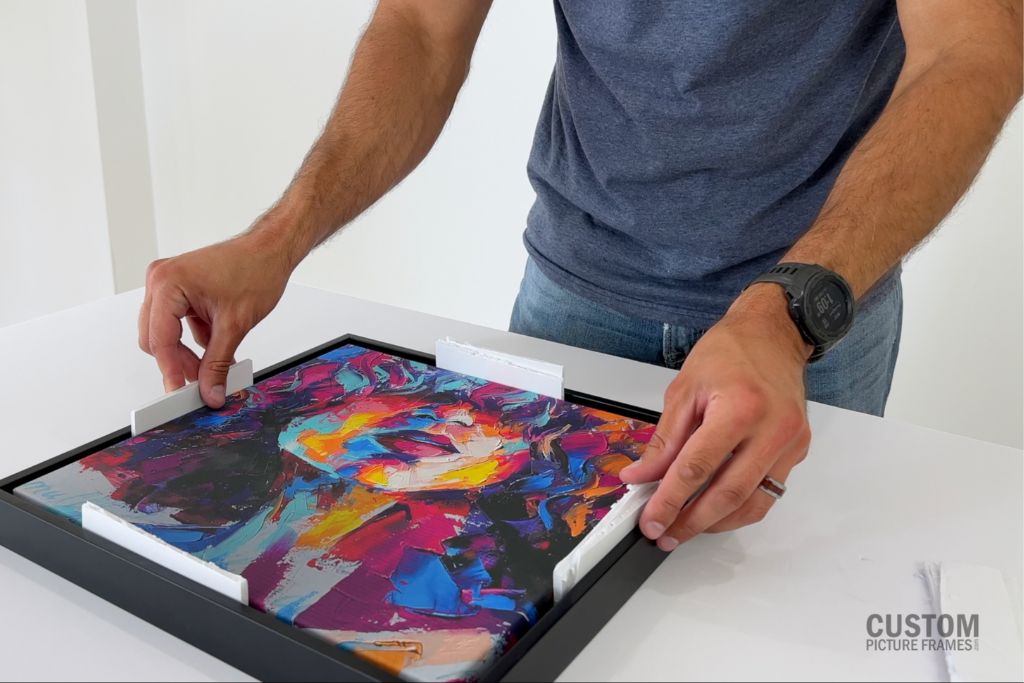
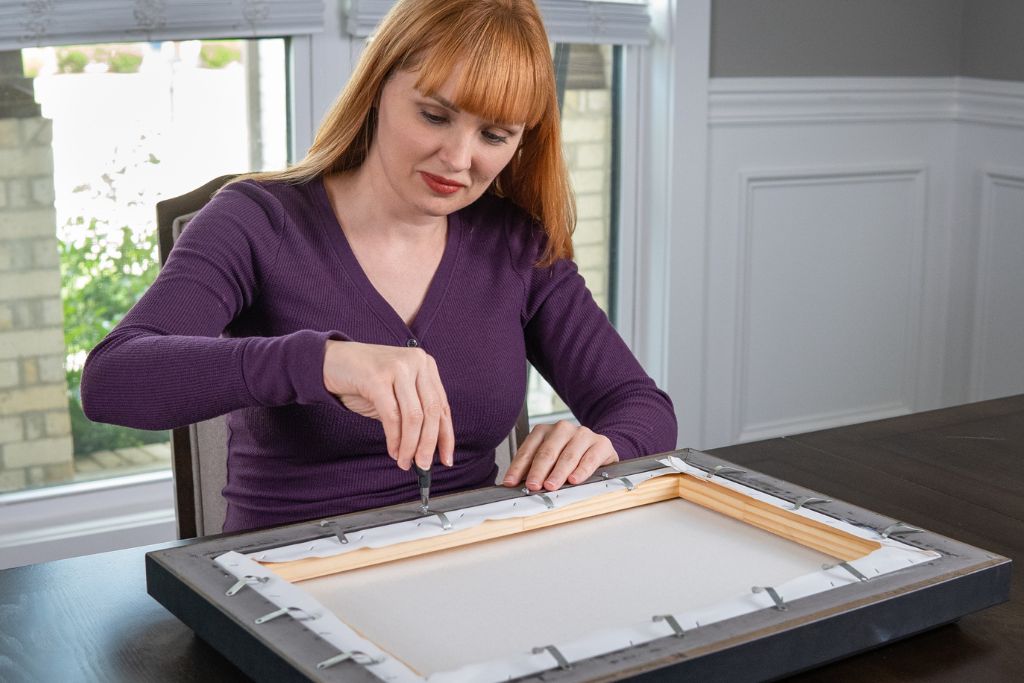
Step 3: Insert Spacers
Turn your frame over and insert your canvas into the frame. Place spacers along the inner edge of the floater frame, ensuring they're evenly distributed. These spacers create a gap between the canvas and the frame, giving it that 'floating' effect. You can use plastic or cardboard spacers; the choice is yours.
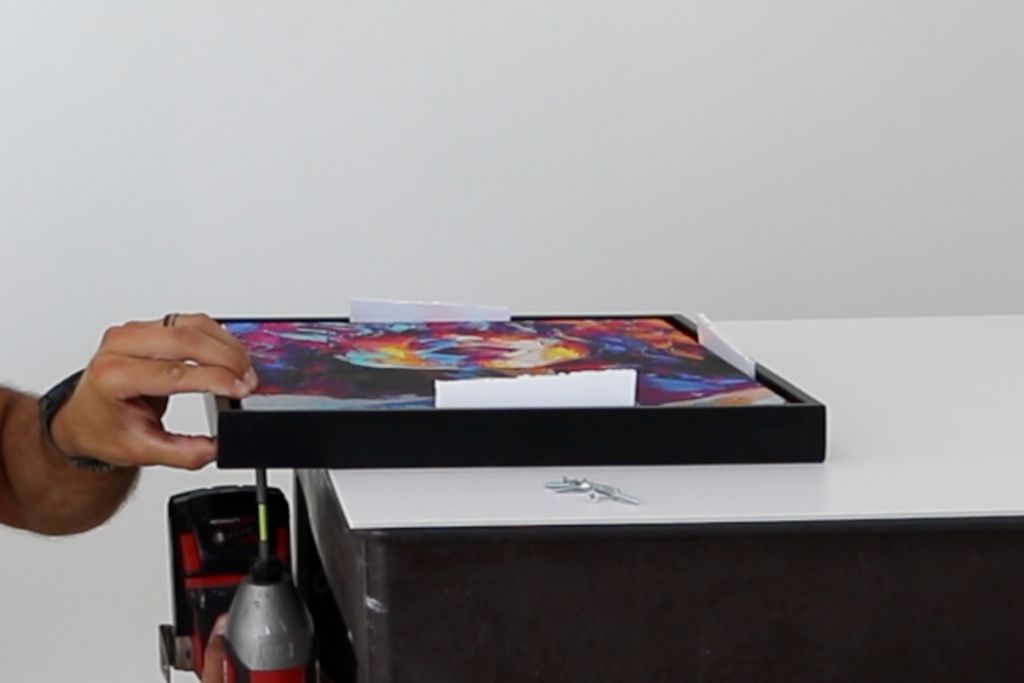
Step 4: Screw It In
Now, it's time to secure your canvas in the floater frame. Slide your frame to the edge of your workspace to make the pilot holes accessible. From one corner, insert screws into the countersink pilot holes in the frame from underneath. Be gentle and use enough pressure to tighten the screws without damaging the canvas. Continue this process for all marked spots around the frame.
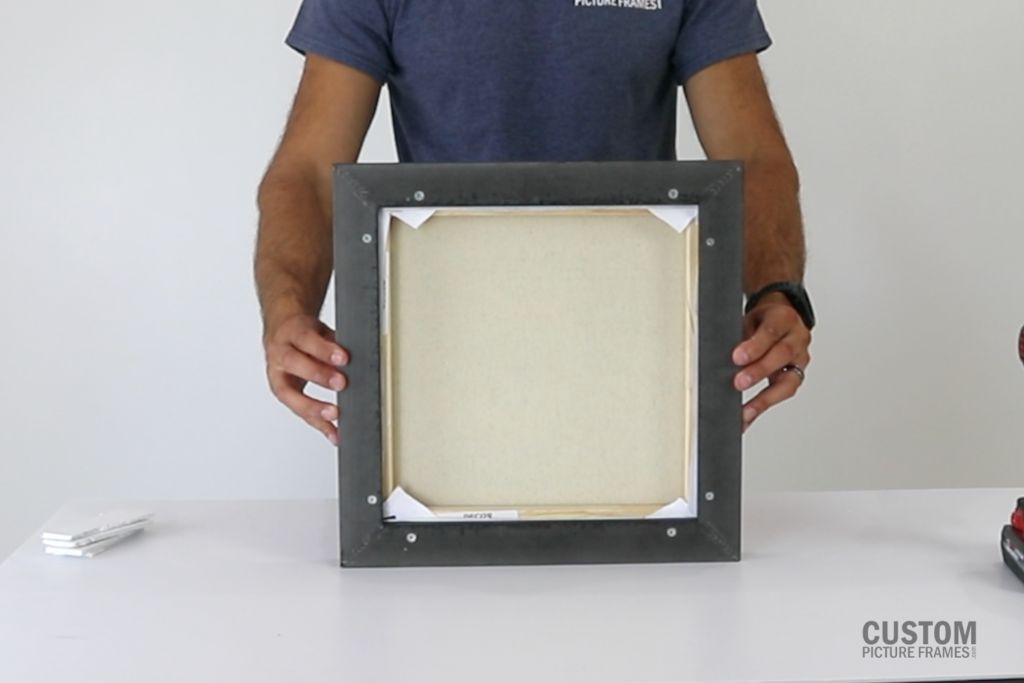
Step 5: Hang Your Masterpiece
With your canvas securely installed in the floater frame, it's now ready to be hung on your wall. Remove the spacers and use appropriate hardware to ensure it's level to showcase your artwork beautifully.
Framing your canvas art in a floater frame is a fantastic way to elevate its presentation and protect it for years. By following this step-by-step guide, including creating countersink pilot holes, using spacers, and carefully screwing the canvas into the frame from underneath, you'll have a professionally framed masterpiece that will impress anyone who sees it. Enjoy your art in all its glory, proudly displayed for all to admire!
About The Author
Brittany DeMauro is the Creative Director here at CustomPictureFrames.com. With a background in creative writing and a passion for all things DIY, you'll find her in the shop crafting content. She can always find space for a fun gallery wall and loves discovering new artists to display around her home (in custom frames, of course!) When she's not creating content for our brand, she can most likely be found binging shows on Netflix with her two cats.
Renter-Friendly Decorating: Creative Ways to Hang Picture Frames Without Nails
August 23, 2023
Decorating your living space with picture frames is a wonderful way to add personality and warmth to your home. However, if you're renting, the thought of putting holes in the walls might make you hesitate. The good news is that there are plenty of innovative alternatives to hanging picture frames without nails (or at least fewer nails), allowing you to enjoy a beautifully decorated space without any lasting damage. In this blog post, we'll explore some creative and renter-friendly options for displaying your cherished memories on the walls.
*NOTE: Be sure to follow instructions on the packaging to ensure proper use and installation to minimize accidents and damages. These methods may still cause damage to your walls, so use caution. When in doubt, talk to your landlord.*
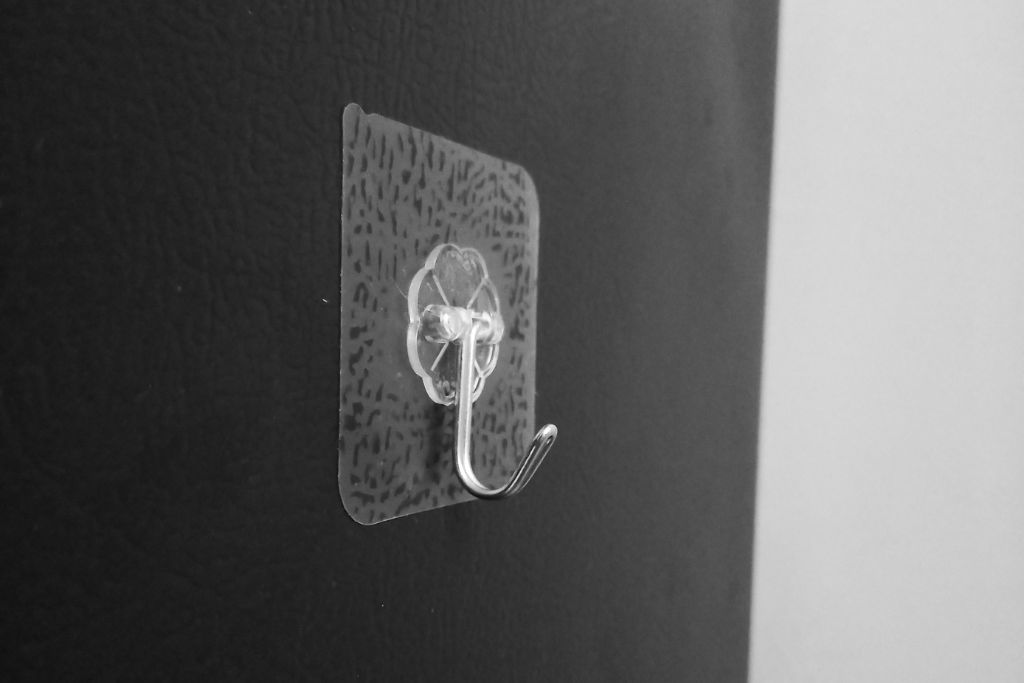
1. Adhesive Hooks and Strips
Adhesive hooks and strips are a renter's best friend when it comes to hanging picture frames without nails. They come in various weight capacities and are designed to hold firmly to the wall without leaving any residue when removed. Simply attach the adhesive hook to the wall and hang your picture frame using the attached wire or sawtooth hanger. When you're ready to move, just peel off the adhesive strip without a trace.
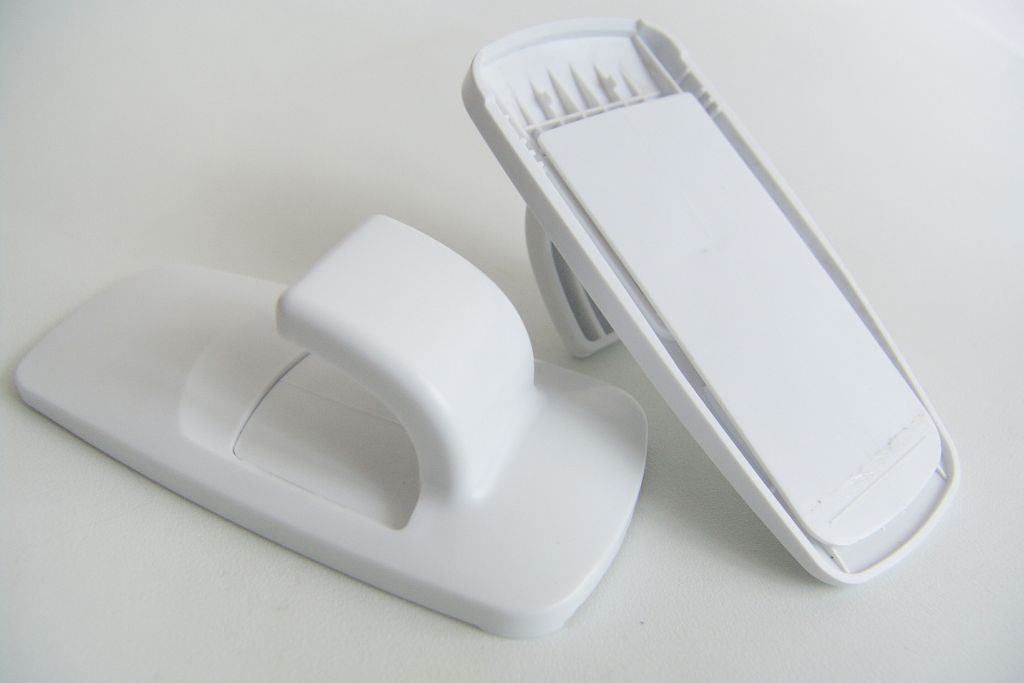
2. Command Hooks
Command Hooks, a brand of adhesive hooks, are specifically designed to offer damage-free hanging solutions. They come in various sizes and styles, making them suitable for various frame weights and designs. Command Hooks are easy to apply and remove, making them an excellent choice for renters who want to personalize their space without making permanent changes.
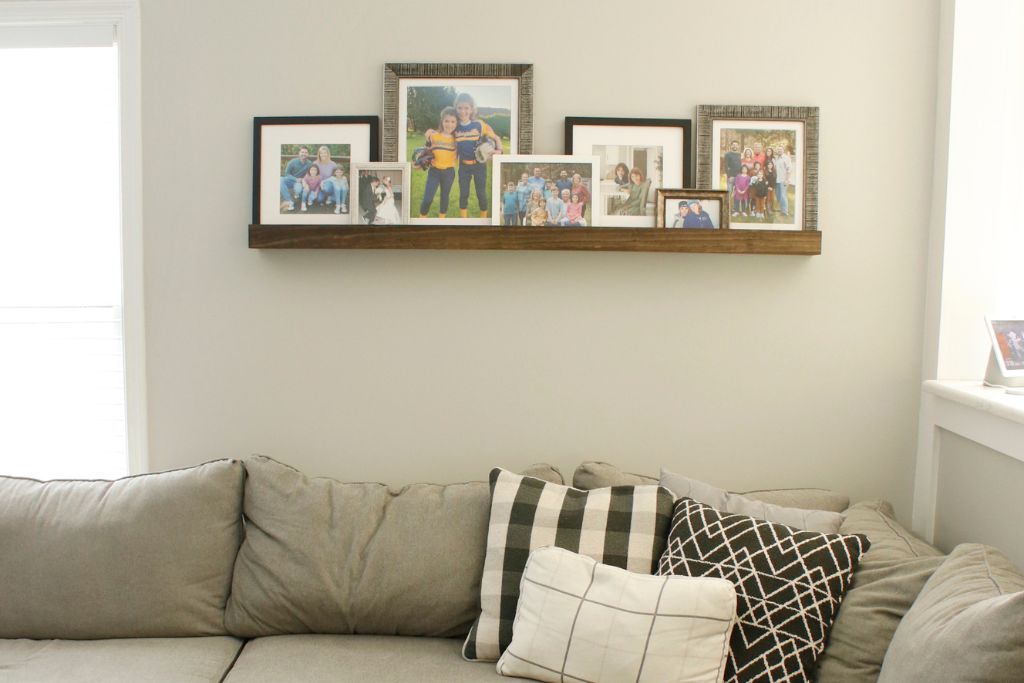
Picture ledges are versatile and stylish options for displaying multiple picture frames without needing nails to display each picture frame. These narrow shelves are installed close to the wall and provide a platform for arranging frames artfully and dynamically with just a few holes in your wall. You can easily change the layout of your frames and swap out pictures as you wish, making picture ledges perfect for showcasing seasonal or rotating displays.
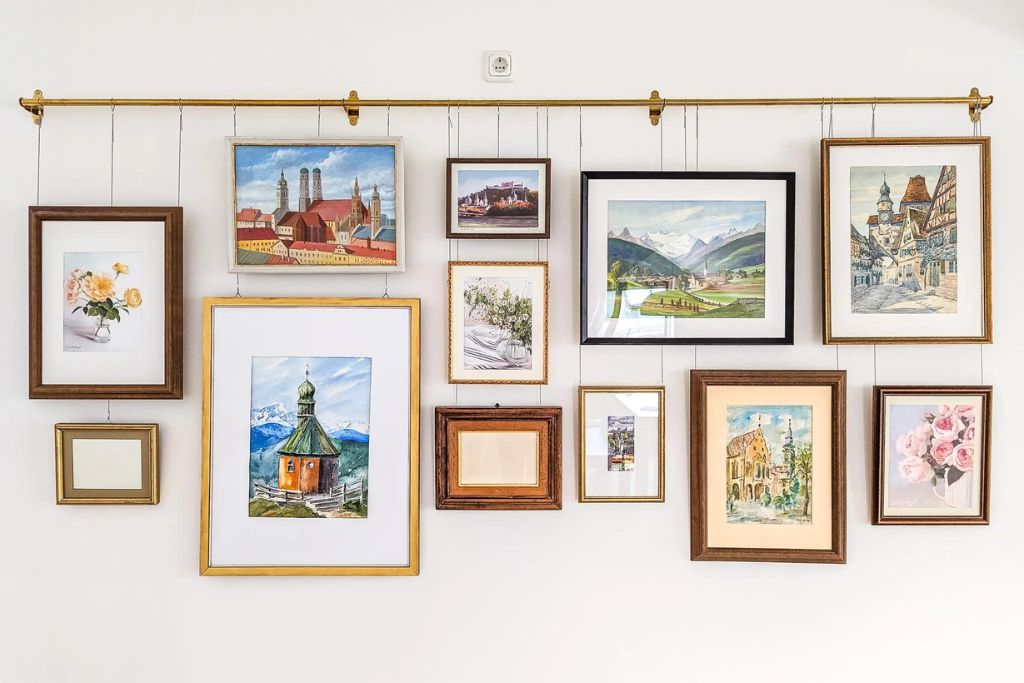
Picture rails are a unique way to display art while minimizing the amount of holes in your walls. You can even use tension rods for a no-hole recreation if your space permits. Tension rods are typically used for curtains, but they can also be a creative way to hang picture frames. Install a rod on your walls, and then hang your frames from the rod using hooks or clips. This method works well for creating a gallery wall without making holes for each picture frame and offers flexibility in arranging your frames.
If you want a playful and temporary solution, decorative washi tape can do the trick. Use washi tape to create a visually appealing border around your pictures to act as frames. This works particularly well for smaller images and adds a touch of color and whimsy to your wall decor.
6. Easel Stands
When in doubt, use your table space. If you have tabletop picture frames, use easel stands to display them on shelves, mantels, or countertops. Easel stands come in various styles and sizes, allowing you to create charming vignettes throughout your space. While this is the most renter-friendly option for displaying picture frames, your tabletop space might be limited, so it's important to weigh your options.
Decorating your rented space with picture frames doesn't have to involve nails and wall damage. By exploring these renter-friendly options, you can personalize your home, add a touch of your own style, and showcase your cherished memories without compromising your lease agreement. From adhesive solutions to creative alternatives, the possibilities for displaying your frames are virtually endless.
Remember, the key is to choose the method that suits your frames' weight and your preferences while keeping in mind the rules and guidelines set by your landlord. With a little creativity and some renter-friendly tools, you can transform your walls into a gallery of memories that truly reflect your personality and style.
Decorating is about making a space feel uniquely yours, and these alternatives to traditional nails ensure that even renters can enjoy a personalized and beautifully adorned living environment.
About The Author
Brittany DeMauro is the Creative Director here at CustomPictureFrames.com. With a background in creative writing and a passion for all things DIY, you'll find her in the shop crafting content. She can always find space for a fun gallery wall and loves discovering new artists to display around her home (in custom frames, of course!) When she's not creating content for our brand, she can most likely be found binging shows on Netflix with her two cats.
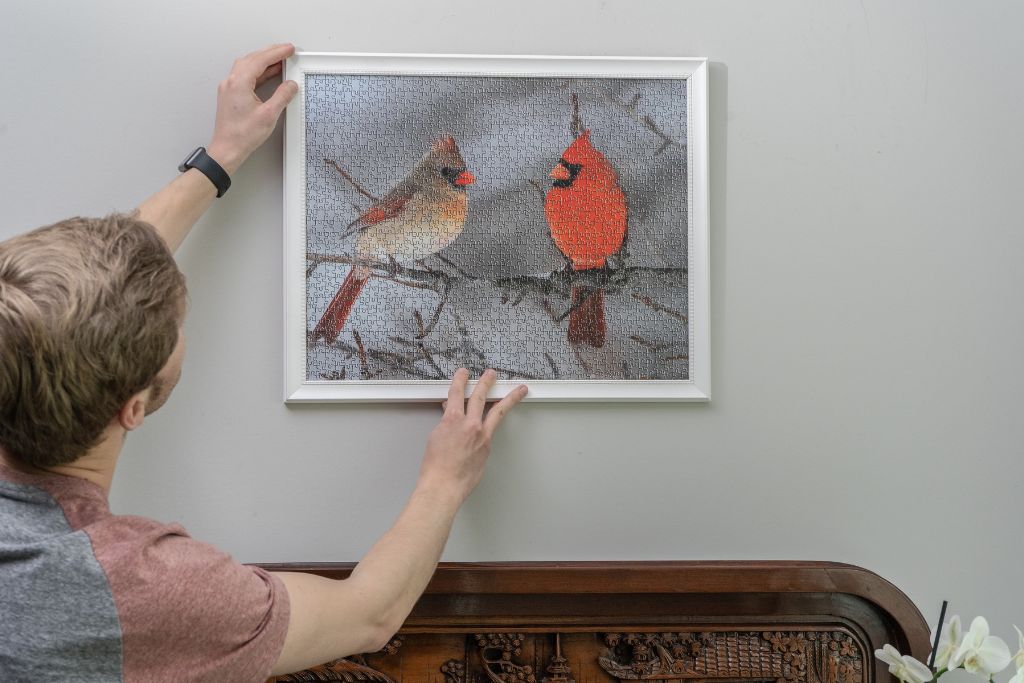
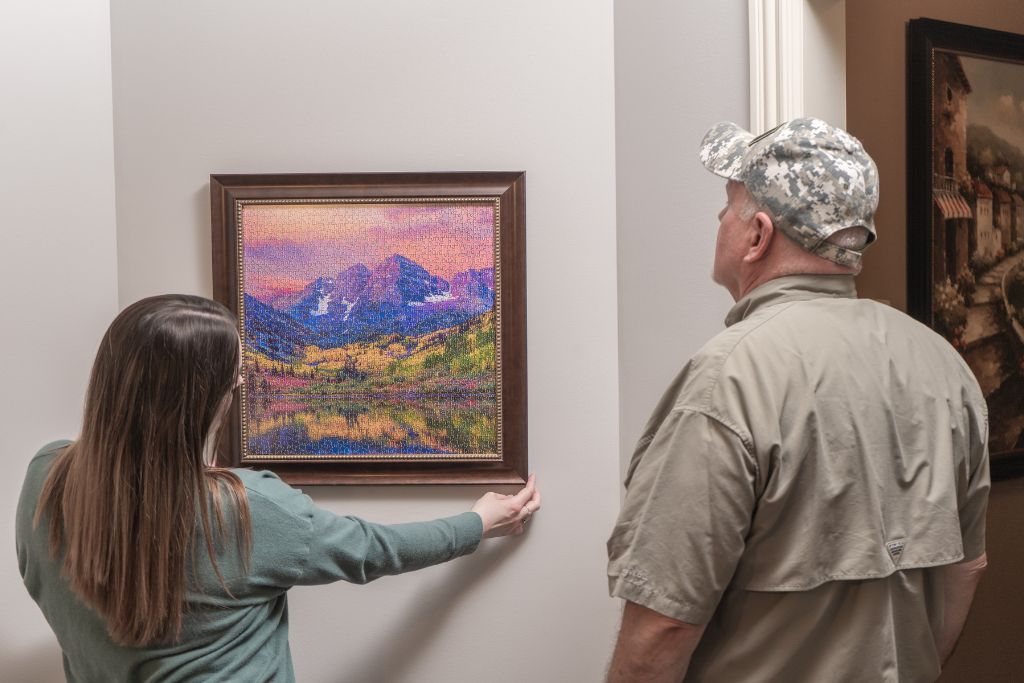
Framing a Puzzle with Puzzle Glue Sheets: Showcasing Your Masterpiece
August 16, 2023
Puzzles have a unique way of captivating our attention and challenging our problem-solving skills. Whether you've completed a complex masterpiece or a beautiful landscape, preserving your hard work by framing it can be a rewarding and visually appealing endeavor. In this blog post, we'll explore how to frame a puzzle using puzzle glue sheets and discuss why displaying your finished puzzles around the house is a wonderful idea.
Framing a Puzzle with Puzzle Glue Sheets
Framing a completed puzzle adds an artistic touch to your decor while also allowing you to proudly showcase your hard work. Puzzle glue sheets are a convenient and effective way to transform your assembled puzzle into a piece of wall art. Here's a step-by-step guide on how to do it:
Frame with backing and front (We also sell puzzle framing kits in common puzzle sizes!)
Double-sided tape or mounting strips
Steps:
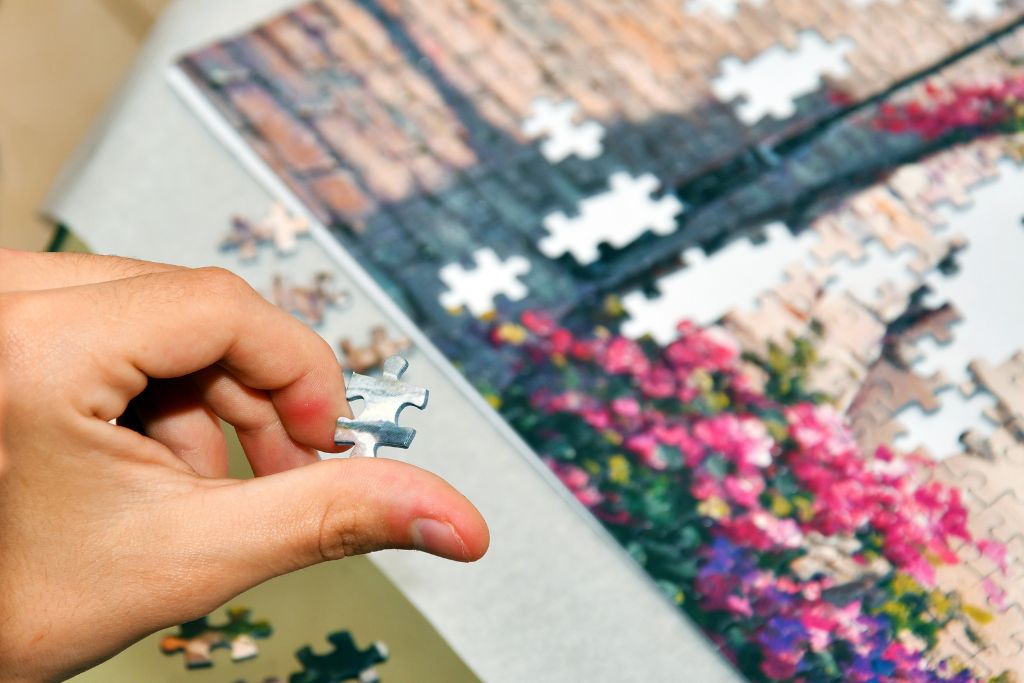
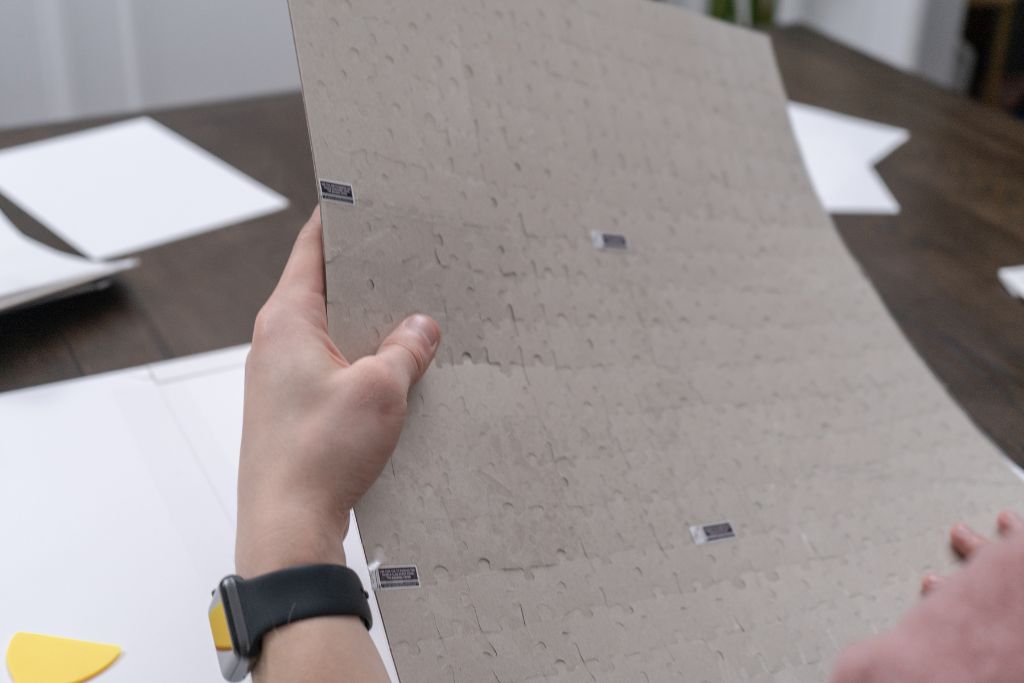
Prepare the Puzzle: Ensure your puzzle is fully assembled and all pieces are properly aligned. Carefully flip your puzzle over using two sheets of cardboard. Replace any puzzle pieces that may have come loose.
Trim the Puzzle Glue Sheets: Measure and cut the puzzle glue sheets to fit the dimensions of your puzzle. Allow for some overlapping to create a stronger bond.
Apply the Puzzle Glue Sheets: Peel the backing off the puzzle glue sheet and gently press it onto the back of the completed puzzle. Repeat this process until you've covered the entire surface of the puzzle. Use a rolling pin or wine bottle to roll over the puzzle glue sheets to ensure a secure seal.
Trim Excess Glue Sheets: Once the back is covered, use a ruler or straight edge to trim any excess puzzle glue sheet that extends beyond the puzzle's edges.
Frame Your Puzzle: Place the puzzle inside a frame with a backing and front. Ensure the glazing is clean before inserting the puzzle to avoid smudges or dust. Secure the puzzle in place with double-sided tape or mounting strips.
Hang and Enjoy: Your framed puzzle is now ready to be hung on the wall as a beautiful piece of art!
Displaying Finished Puzzles: A Decorative Delight
Displaying finished puzzles around your home isn't just about showcasing your accomplishments—it also adds character and charm to your living spaces. Here are some reasons why you should consider displaying your completed puzzles:
Conversation Starters:Framed puzzles are excellent conversation starters. Guests and visitors will be intrigued by the vibrant artwork and might even be inspired to try their hand at puzzle solving.
Personal Touch: Displaying your finished puzzles adds a personal touch to your decor, reflecting your interests and hobbies.
Wall Art with a Twist: Puzzles provide a unique form of wall art that's both visually engaging and interactive. Your artwork isn't just something to admire. It's also a testament to your patience and dedication.
Memorable Moments: Completing a puzzle is often a shared experience. Displaying a finished puzzle can evoke fond memories of working together with loved ones to achieve a common goal.
Colorful and Creative: Puzzles come in various themes and designs, adding a burst of color and creativity to your walls. You can choose puzzles that match your room's color scheme or add a pop of contrast.
Constant Enjoyment: Unlike traditional artwork, puzzles offer continuous enjoyment. You can always take a moment to admire the intricate details or engage in a little puzzle-solving whenever you pass by.
Whether it's a family portrait puzzle or a picturesque landscape, framing your completed puzzles with puzzle glue sheets can turn them into cherished art pieces. The process is simple, and the rewards are numerous—beautiful wall decor that sparks conversations, adds character and reminds you of the joy that puzzle-solving brings. So, pick your favorite completed puzzle, follow the framing steps, and let your creativity and accomplishment shine proudly on your walls!
Whether you're an avid puzzler or appreciate the artistry of completed puzzles, framing them using puzzle glue sheets is a creative way to display your achievements and add an extra layer of charm to your living spaces.
About The Author
Brittany DeMauro is the Creative Director here at CustomPictureFrames.com. With a background in creative writing and a passion for all things DIY, you'll find her in the shop crafting content. She can always find space for a fun gallery wall and loves discovering new artists to display around her home (in custom frames, of course!) When she's not creating content for our brand, she can most likely be found binging shows on Netflix with her two cats.
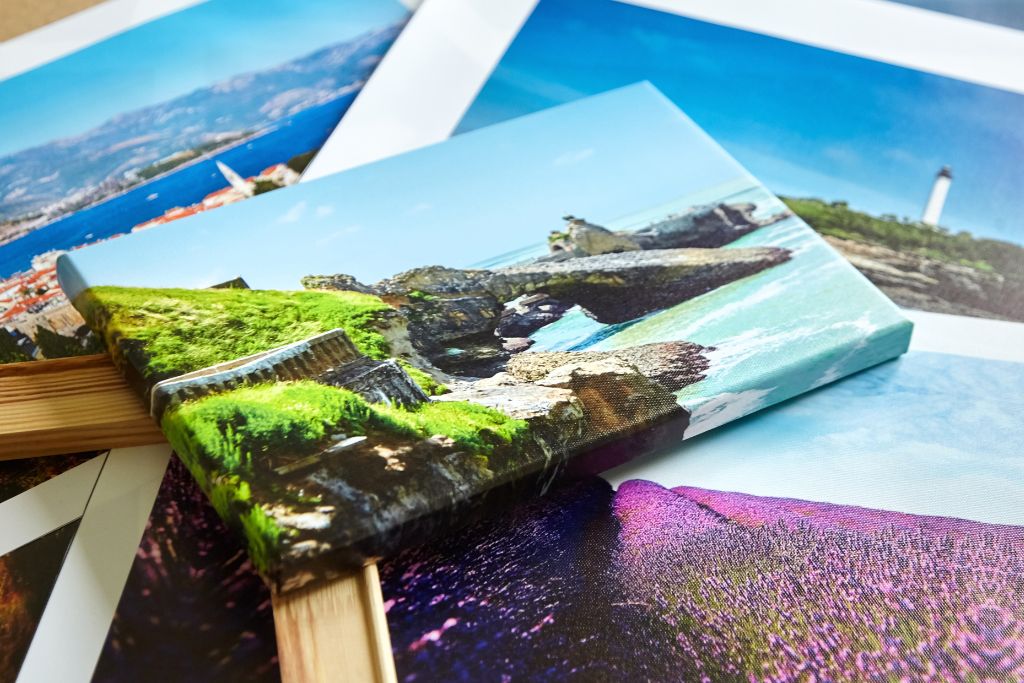
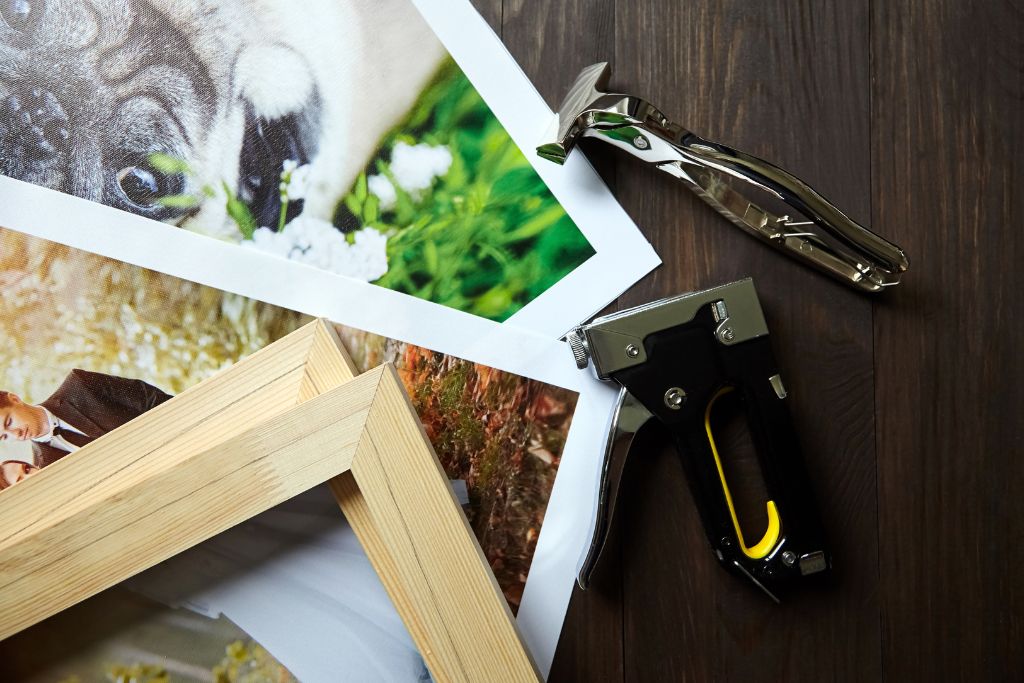
Canvas Framing 101: Tips for Showcasing Your Canvas Prints
August 09, 2023
Due to their stunning visual appeal and durability, canvas prints have become a popular choice for art lovers and home decorators. Whether you have a cherished photograph or a beautiful piece of artwork on canvas, framing it thoughtfully can elevate its impact and transform your living spaces. In this Canvas Framing 101 guide, we'll explore some valuable tips to help you showcase your canvas prints like a pro.
Know the Type of Wrap
Gallery wrap and studio wrap are two popular methods of stretching canvases, each offering distinct presentations for your photo or artwork. Understanding their differences can help you choose the most suitable option for showcasing your canvas prints.
Gallery Wrap Stretched Canvas: Gallery wrap is a technique where the canvas is stretched and wrapped around the stretcher bars, with the artwork's image extending over the sides. This creates a seamless, frameless appearance, allowing the artwork to be displayed without needing an external frame. The sides of the canvas are usually blank or feature a continuation of the main image. Gallery wrap canvases are ideal for modern and contemporary artworks and photographs, where the focus is on the central image itself. They provide a clean and minimalist look that draws attention to the artwork's subject without the distraction of a frame.
Studio Wrap Stretched Canvas: Studio wrap, also known as museum wrap or full bleed wrap, is another stretching method where the canvas is wrapped around the stretcher bars, but the entire image is visible from the front, including the edges. Unlike gallery wrap, the sides of the canvas in studio wrap are an extension of the main image, giving the impression that the artwork is "bleeding" off the edges. This method ensures that no part of the artwork is lost on the sides, making it suitable for artworks with essential details or elements that extend to the edges. Studio wrap canvases offer a more immersive and dimensional look, emphasizing the continuity of the artwork from the front to the sides.
Choosing Between Gallery Wrap and Studio Wrap: The choice between gallery wrap and studio wrap largely depends on the style and composition of your image and your personal preferences. If your artwork has a central focus and looks aesthetically pleasing without the need for additional framing, gallery wrap might be the better option. On the other hand, if your artwork has important details or elements that extend to the edges and you want a more immersive presentation, studio wrap can be a great choice. Ultimately, both methods provide excellent ways to display your canvas prints, and you can select the one that complements your photo or art and suits the overall ambiance of your living space.
Pay Attention to Canvas Depth
Paying attention to the depth of your canvas photo or art is a crucial aspect to consider when selecting a frame, as it directly influences the overall presentation and fit of your artwork within the frame. The depth of a canvas refers to the thickness of the stretcher bars that support and stretch the canvas material. These stretcher bars determine how much the canvas protrudes from the wall when framed and can significantly impact the final look of your artwork.
When choosing a frame for your canvas, it's essential to select one with the appropriate depth that complements the thickness of your canvas. Opting for a shallow frame is ideal if your canvas has thin stretcher bars and is relatively flat against the wall. A shallow frame closely hugs the canvas, creating a sleek and minimalist appearance. This option is particularly suitable for canvases that are intended to blend seamlessly into the overall decor or for artworks with subtle textures and minimal relief.
On the other hand, if your canvas features thick stretcher bars and has more pronounced depth, a deeper frame is the way to go. A deep frame provides ample space for the canvas to fit comfortably without feeling cramped. This style is well-suited for canvases with intricate textures, heavy brushstrokes, or 3D elements, as it allows the artwork's depth to be showcased and celebrated within the frame.
Choosing the wrong frame depth can result in an ill-fitting or awkward presentation. If a shallow canvas is placed in a deep frame, it may appear recessed and overwhelmed by the frame's thickness, diminishing the impact of the artwork. Conversely, if a deep canvas is squeezed into a shallow frame, it may protrude from the frame's back or be difficult to secure properly, compromising the artwork's stability and safety.
Choose the Right Frame
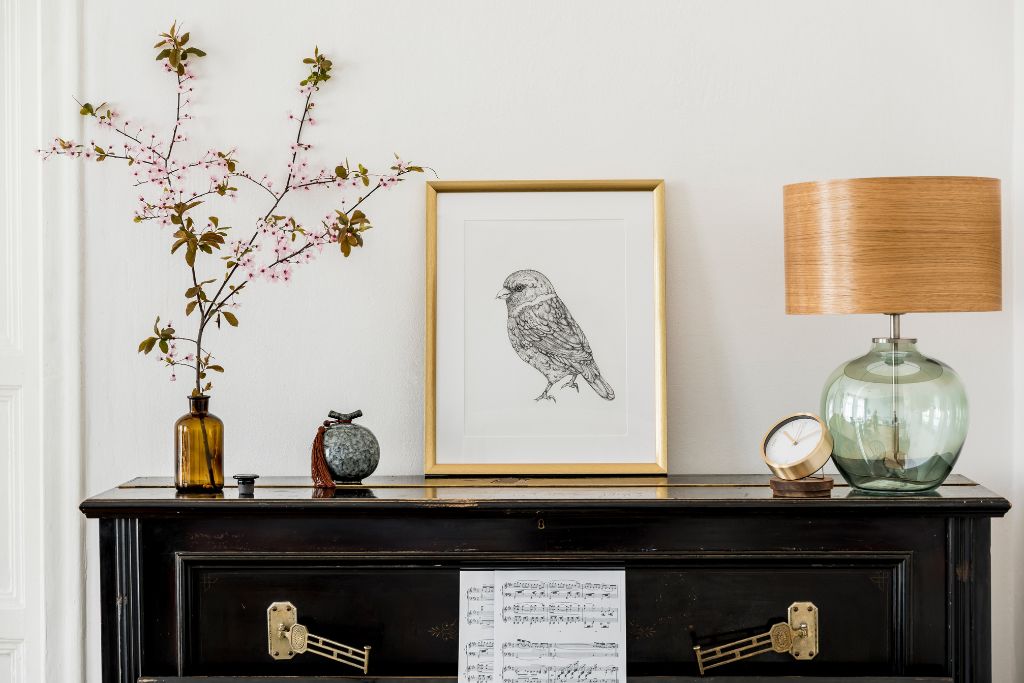
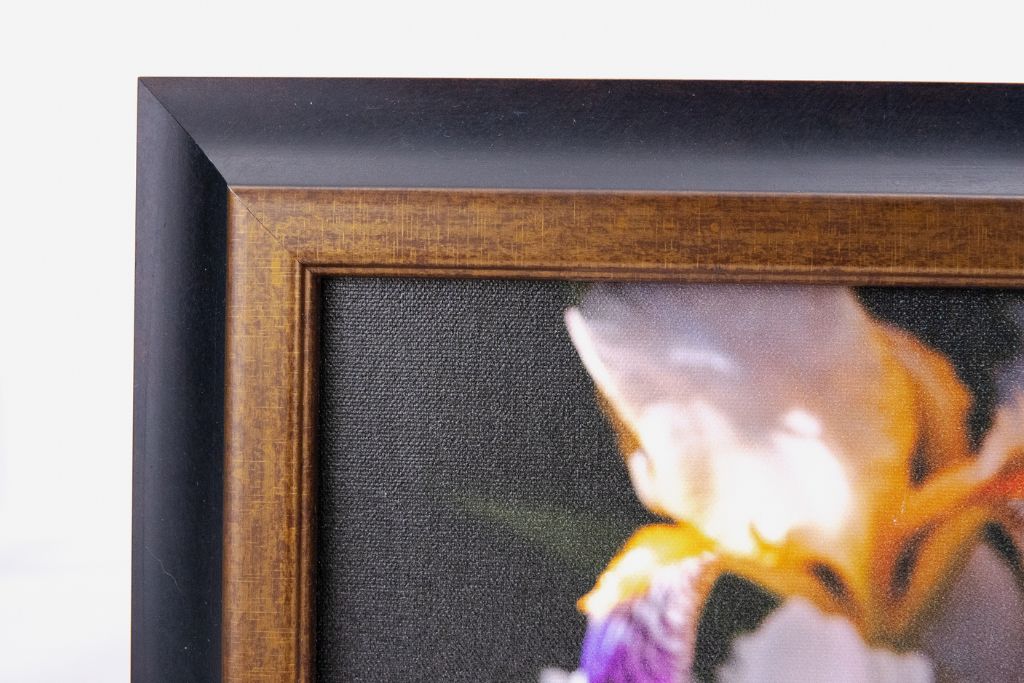
When it comes to choosing the right frame for your canvas photo or art, wooden frames offer timeless elegance and versatility. Wooden frames are available in various finishes and styles, making them suitable for a wide range of artistic expressions. For a contemporary and sophisticated look, consider canvas floater frames. These frames create a striking effect by allowing the canvas to "float" within the frame, leaving a small gap between the artwork and the frame's inner edges. This design highlights the entire canvas, including its edges, giving your art a captivating three-dimensional presence.
On the other hand, if you prefer a more traditional approach, deep profile frames are an excellent choice. These frames encompass the edges of the stretched canvas, providing a snug and classic presentation. Deep profile frames add depth to your artwork and offer a polished finish, giving your canvas photo or art a refined and museum-quality appearance. Whatever style you opt for, wooden frames are sure to complement and enhance your canvas, bringing out the best in your cherished memories or artistic creations.
Seek Professional Framing Services
Seeking professional framing services when framing a canvas photo or art print offers several significant benefits that can enhance your artwork's overall presentation and longevity.
Expertise and Experience: Professional framers have extensive knowledge and experience in handling various types of artwork, including canvas prints. They understand the intricacies of framing materials, techniques, and design elements, ensuring your artwork is perfectly framed.
Quality Materials: Professional framers use high-quality materials to protect and preserve your artwork. From acid-free mats and UV-protective glass to sturdy stretcher bars, they ensure that your canvas print is framed using materials that will safeguard it from damage and fading over time.
Customization Options: Framing professionals offer a wide range of customization options, allowing you to choose from an extensive selection of frames, mat boards, and glazing options. This ensures that your canvas print is framed in a way that complements its style, colors, and dimensions, resulting in a personalized and visually pleasing presentation.
Preservation and Conservation: Framing experts take conservation seriously, ensuring that your canvas photo or art print is framed using archival and museum-grade materials. This not only enhances the longevity of your artwork but also protects it from dust, moisture, and other potential environmental factors.
Professional Finish: Professional framers have the tools and skills to ensure your framed canvas's polished and professional finish. They precisely cut mats, expertly align the artwork, and professionally mount the canvas, ensuring the final product looks stunning and gallery-worthy.
Additionally, for added convenience, our website offers the option to print your files on canvas and then frame them. This all-in-one service allows you to upload your digital files, have them professionally printed on canvas, select a frame, and have the finished, framed canvas delivered right to your doorstep. This seamless process saves you time and effort, making it easy to transform digital images into beautiful, framed artwork without leaving your home.
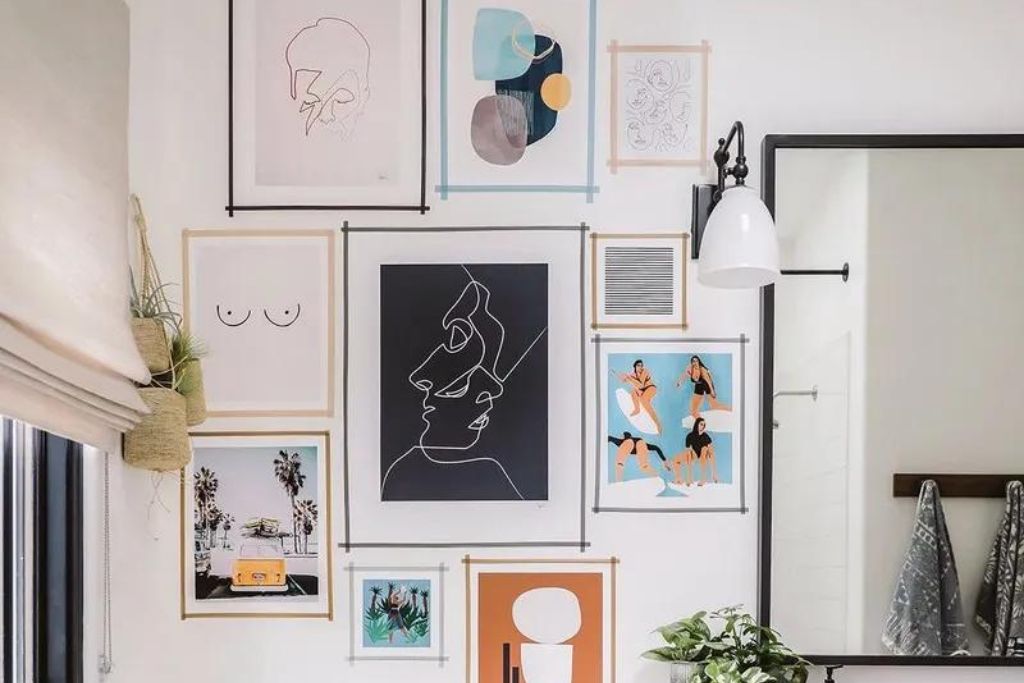
Grouping and Arrangement
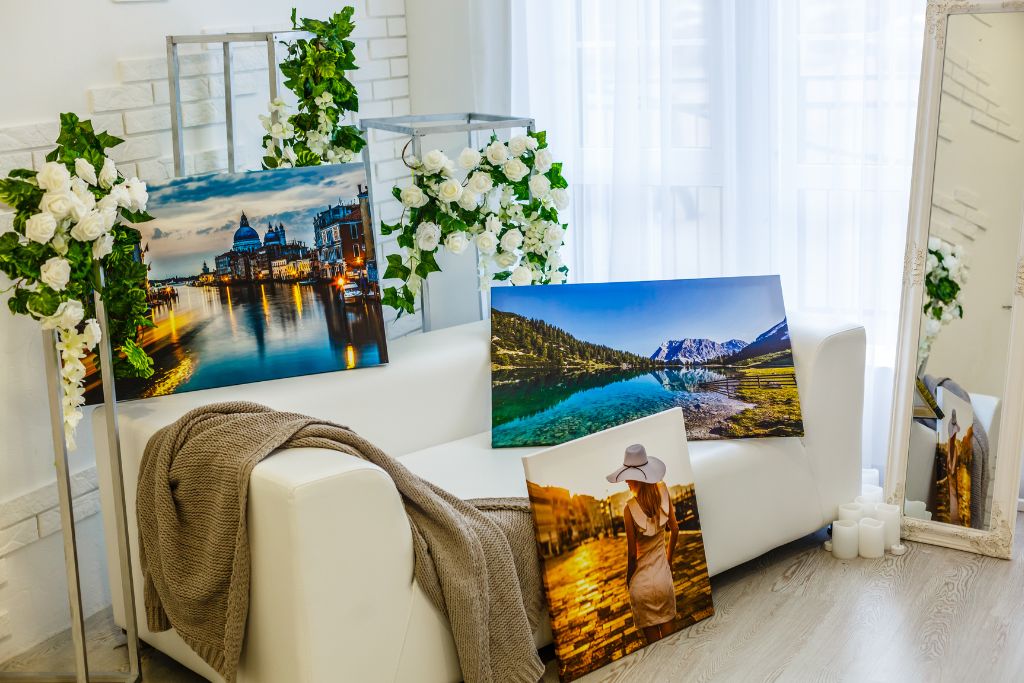
Creating a captivating gallery wall with grouped canvas prints is an art in itself and can transform any blank wall into a stunning display of memories and artistic expression. One of the keys to success is mixing and matching different sizes and styles of frames. The interplay between various dimensions and designs adds visual intrigue and depth to your arrangement. Larger canvases draw attention and act as anchor pieces, while smaller ones complement them, creating a harmonious balance.
Before committing to a final arrangement, take advantage of the floor as your canvas. Lay out the canvas prints in different configurations, experimenting with different layouts until you find the perfect composition. This approach allows you to visualize the arrangement on a larger scale and easily adjust. To enhance the overall aesthetic, you can easily swap positions, rearrange the order, or introduce additional elements, such as wall decals or decorative accents.
By following these tips, you can confidently display your canvas prints and turn them into captivating focal points within your home or office. Whether it's a cherished memory or an artistic masterpiece, framing your canvas with care and consideration will enhance its beauty and allow you to enjoy it for years to come.
About The Author
Brittany DeMauro is the Creative Director here at CustomPictureFrames.com. With a background in creative writing and a passion for all things DIY, you'll find her in the shop crafting content. She can always find space for a fun gallery wall and loves discovering new artists to display around her home (in custom frames, of course!) When she's not creating content for our brand, she can most likely be found binging shows on Netflix with her two cats.
Incorporating Shadow Boxes into Your Home Decor: Tips and Inspirations
August 02, 2023
When it comes to interior design, finding unique ways to display your cherished memories and keepsakes can add a touch of personality and warmth to your living spaces. Incorporating shadow boxes into your home decor is a versatile and visually captivating option. Shadow boxes provide a three-dimensional space to showcase your favorite items, allowing you to create stunning displays that reflect your style and story. In this blog post, we'll explore tips and inspirations on using shadow boxes in your home decor effectively.
1. Choose Meaningful Items
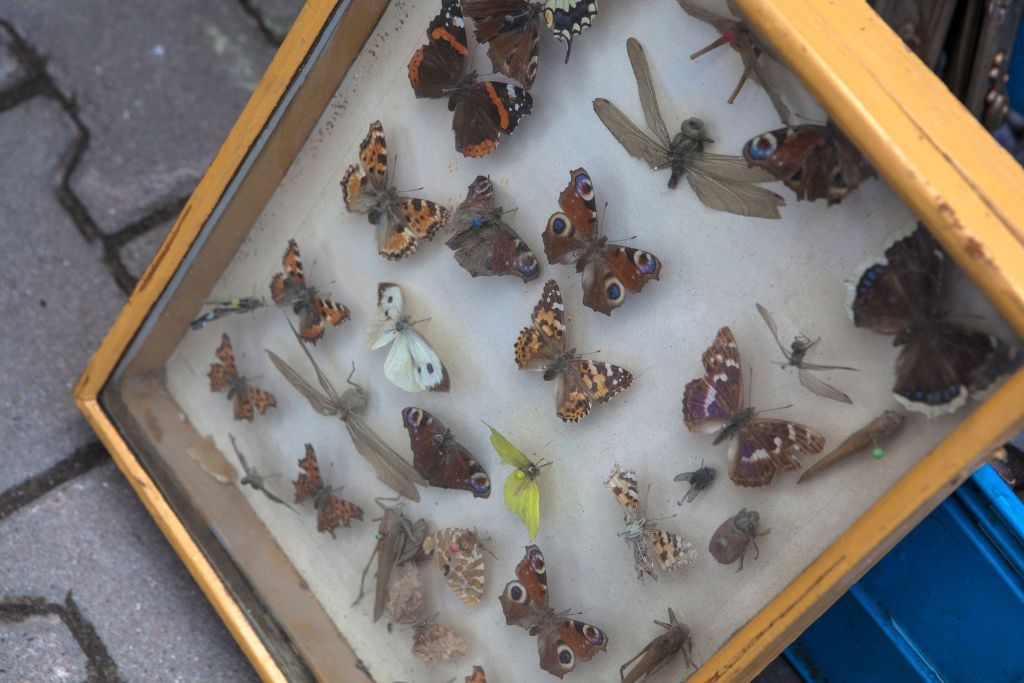
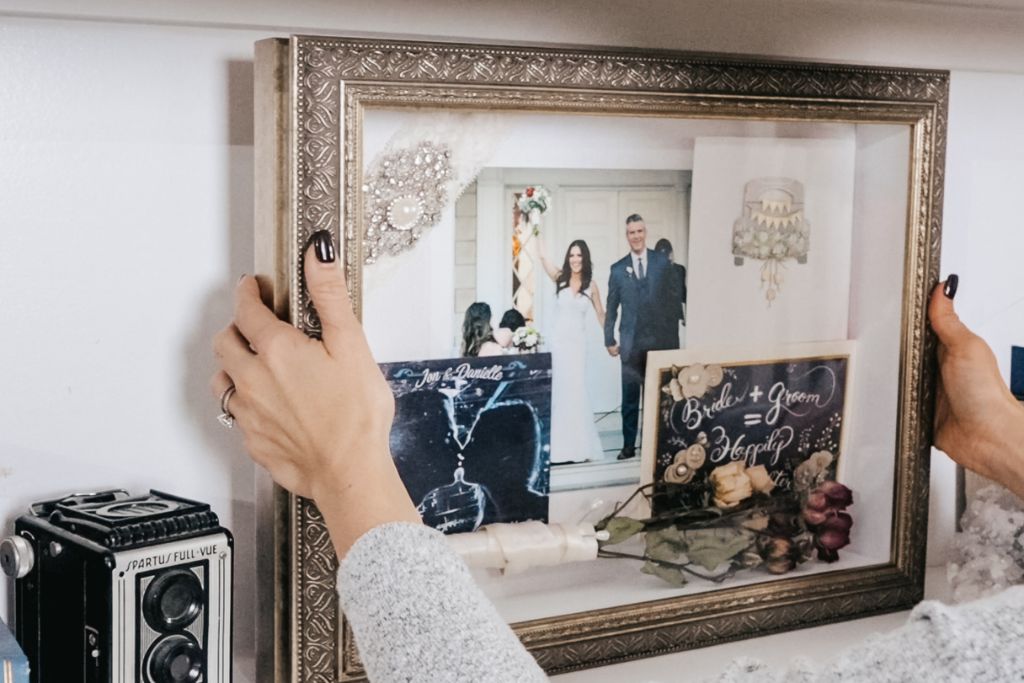
The key to creating a captivating shadow box display is to carefully curate the items you include. Select pieces that hold sentimental value or have a special meaning to you. This could be anything from vacation souvenirs, family heirlooms, concert tickets, pressed flowers, or even tiny mementos from significant life events. Each item you choose should contribute to the overall narrative of the display, telling a unique story that resonates with you and your guests.
2. Embrace Variety
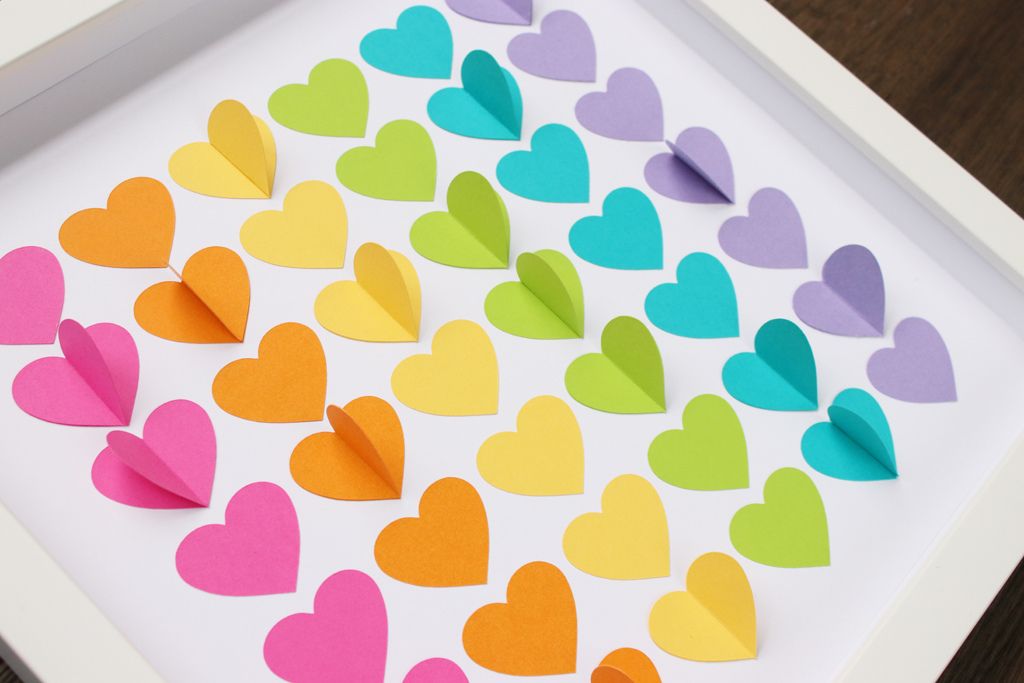
Don't shy away from mixing and matching different shapes, sizes, and colors of shadow boxes. Embrace variety to add visual interest and create a dynamic arrangement. You can experiment with square, rectangular, or even irregularly shaped shadow boxes to add a touch of whimsy to your decor. For a cohesive look, consider sticking to a particular color scheme or theme that complements your home's overall aesthetic.
3. Play with Arrangements
The beauty of shadow boxes lies in their versatility. You can arrange them in various configurations to suit your preferences. For instance, you can create a symmetrical arrangement with identical shadow boxes or opt for an eclectic mix of sizes and shapes for a more artistic and organic feel. Experiment with different layouts on a table, wall, or even as a standalone shelf display until you find the arrangement that resonates with you the most.
4. Bring Life to Your Travel Memories
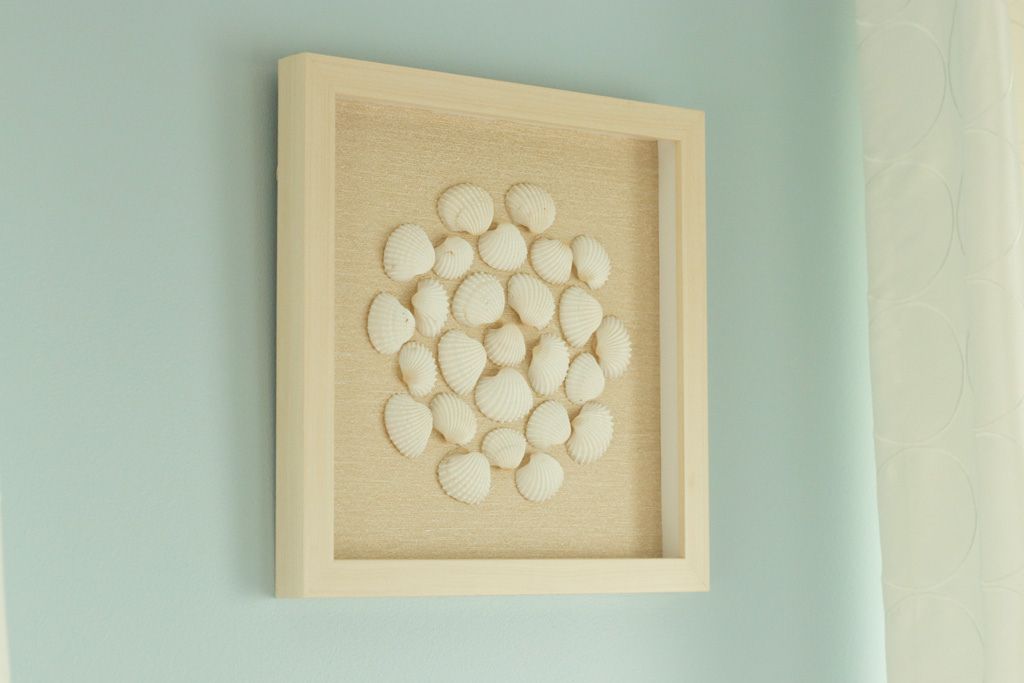
Do you have a collection of travel souvenirs gathering dust in a drawer? Let your wanderlust shine by using shadow boxes to display these treasures. Whether it's seashells from a beach vacation, foreign coins, postcards, or small trinkets, arranging them in a shadow box can evoke fond memories of your adventures and add a personal touch to your space.
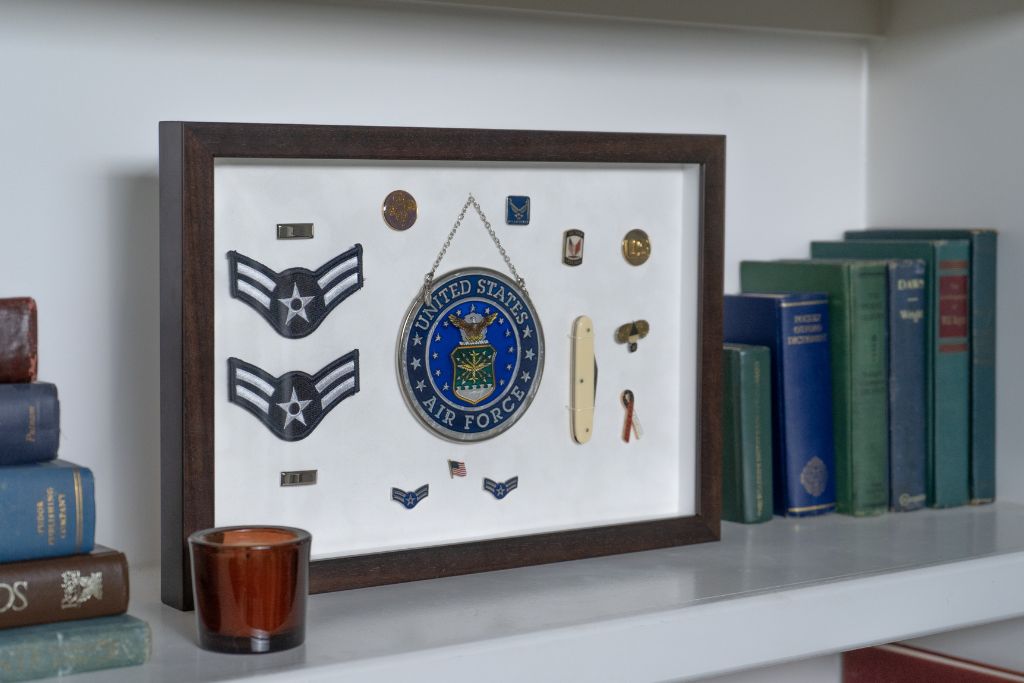
5. Preserve Milestones
Celebrate life's milestones and achievements by creating dedicated shadow boxes for each occasion. Whether it's a graduation cap and tassel, a tiny pair of baby shoes, or a badge of honor from a career achievement, these cherished moments can be beautifully preserved in a shadow box display. As time passes, these shadow boxes will become nostalgic focal points in your home, reminding you of the joy and triumphs you've experienced.
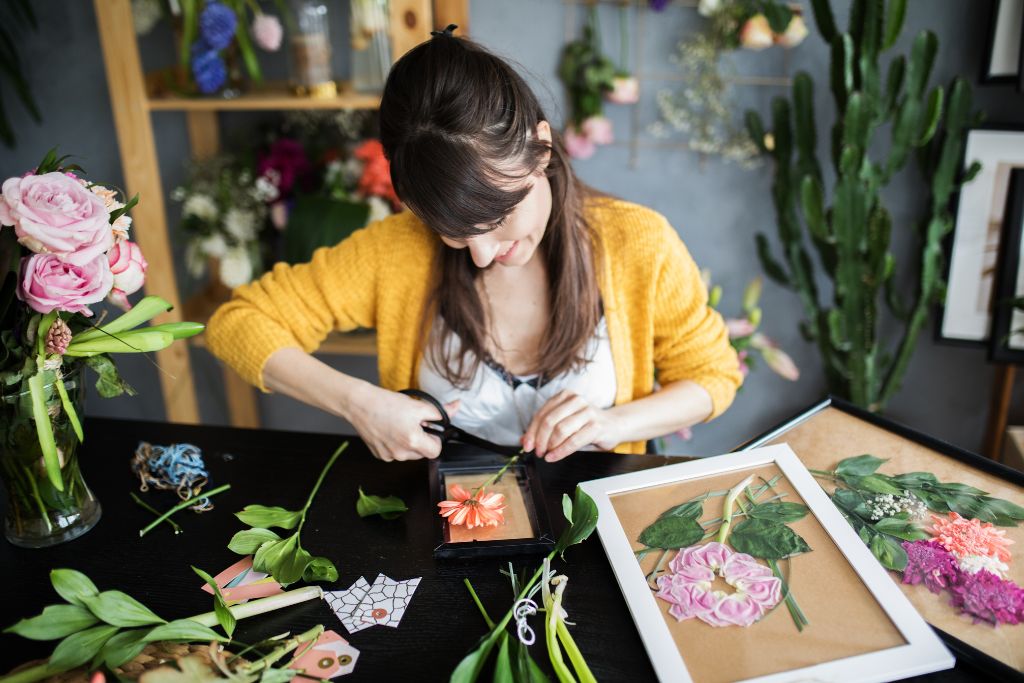
6. Incorporate Botanical Beauty
For nature enthusiasts, shadow boxes offer a splendid opportunity to showcase the beauty of the outdoors. Collect dried flowers, leaves, or branches and arrange them in a shadow box for a touch of organic elegance. The gentle reminder of nature's beauty can breathe life into any room, adding a sense of tranquility and harmony to your home decor.
7. Showcase Artwork
Float mounting art in a shadow box frame is a sophisticated and captivating way to showcase your cherished artwork. Unlike traditional framing methods, where the artwork is pressed against the glass, float mounting creates a sense of depth and dimension by allowing the piece to seemingly "float" within the frame. The result is a gallery-worthy display that protects your art and enhances its overall beauty, making it a centerpiece in any room's decor.
8. DIY Creativity
Feeling crafty? Get hands-on and create your own unique shadow boxes. You can transform old frames, wooden boxes, or vintage containers into customized shadow boxes with a bit of creativity and paint. This allows you to tailor the design to your taste and gives you a sense of accomplishment in showcasing your DIY talents.
Here are some DIY Shadow Box projects for inspiration:
Incorporating shadow boxes into your home decor opens up a world of creative possibilities. From preserving cherished memories to showcasing your passions, these versatile displays bring depth and personality to your living spaces. So, gather your treasured items, tap into your creativity, and let your shadow boxes tell your story.
Remember, the beauty of shadow boxes lies in their ability to evolve with your life's journey. Update and rearrange them as you create new memories and collect more treasures. Embrace the sentimentality and artistry of these displays, and watch as they infuse your home with love and character.
About The Author
Brittany DeMauro is the Creative Director here at CustomPictureFrames.com. With a background in creative writing and a passion for all things DIY, you'll find her in the shop crafting content. She can always find space for a fun gallery wall and loves discovering new artists to display around her home (in custom frames, of course!) When she's not creating content for our brand, she can most likely be found binging shows on Netflix with her two cats.