SUMMER SALE | SAVE 15% OFF WITH CODE SUMMER | Offer Details
Skip to content
  • Bring the Outdoors In: Biophilic Framing Ideas to Refresh Your Space

    July 14, 2025

    Nature-inspired interiors are trending, and we’re here for it. Whether it’s a botanical print, a photo from your garden, or a calming landscape, custom framing helps bring those fresh, organic vibes indoors, beautifully and affordably. With real wood frames handcrafted in New Jersey and shipped nationwide, CustomPictureFrames.com makes it easy to create a space that feels grounded, calm, and connected to nature.

    What Is Biophilic Design? 

    Biophilic design is all about reconnecting with nature by incorporating natural elements into your home. From greenery to sunlight to nature-inspired art, this trend helps reduce stress, boost mood, and improve indoor environments. And it’s not just about live plants! Framed artwork plays a huge role in setting the tone. Think leafy prints, forest photography, and garden snapshots that turn your walls into serene landscapes.

    botanical print and dried flowers

    Nature-Inspired Art Ideas to Frame 

    Nature has long been a source of inspiration in art, and now it's taking center stage in interior design. Framing nature-themed artwork is a simple yet meaningful way to invite calming, organic elements into your home. Whether you’re looking to create a statement wall or add a subtle touch of green to your space, these ideas are a great place to start.

    Looking for the perfect pieces to frame? Try:

    • Vintage or modern botanical prints
    • Watercolor florals or pressed flowers
    • Your own garden photos or nature snapshots from hikes
    • Landscape photography and scenic views
    • Nature-themed kids’ art

    Pro tip: Those flower or sunset pics on your phone? Print them and make them shine with a custom frame.

    pressed flowers on canvas

    Frame Styles That Complement Natural Themes 

    The right frame can enhance the earthy tones and textures found in nature-inspired art. Choosing frames that reflect the raw beauty of the outdoors can make your artwork feel even more authentic and immersive. Think natural wood tones, subtle finishes, and profiles that let your art breathe.

    Pair your nature-inspired pieces with frames that echo the outdoors:

    • Rustic wood tones like barnwood, walnut, or weathered oak
    • Earthy finishes and matte textures
    • Thin, minimal profiles to let the art shine
    • Float frames for canvas botanicals
    • Shadow boxes for pressed flowers, leaves, feathers, or natural keepsakes

    Every frame is made from real wood, sustainably sourced, and built to order right here in the USA.

    acrylic float frame with landscape print
    Image Credit: @maileebarkdull

    How to Style Biophilic Framed Art at Home 

    Bringing biophilic design into your home doesn’t mean a total makeover. Even a few well-placed pieces of framed nature art can shift the feel of a room. The key is to create balance. Pair natural elements with thoughtful design to make your home feel calm, welcoming, and refreshed.

    Biophilic framed art works in every room. Here are some ways to style it:

    • Pair framed prints with potted plants for a "gallery meets greenhouse" vibe
    • Add botanical art to your bathroom or bedroom for a spa-like retreat
    • Layer framed pieces on shelves alongside natural textures like linen, jute, and rattan
    • Create a calming gallery wall with a mix of photos, prints, and natural objects

    Tip: Keep it cohesive with a consistent frame finish or mat color for a pulled-together look.

    framed butteryfly

    Image Credit: @thetinytopiary

    Bring the outdoors in with a frame-worthy touch. Whether you're preserving a flower from your garden or displaying your favorite mountain view, we’ll custom build a frame to match. Made to order in New Jersey and shipped nationwide, our frames are ready to bring a breath of fresh air to your walls.

    Browse our frame collection at CustomPictureFrames.com to print and frame your own nature-inspired art and photos. From botanical prints to outdoor snapshots, we’ll help you bring the beauty of the outdoors into your home.


    About The Author

    Brittany DeMauro Headshot Brittany DeMauro is the Creative Director here at CustomPictureFrames.com. With a background in creative writing and a passion for all things DIY, you'll find her in the shop crafting content. She can always find space for a fun gallery wall and loves discovering new artists to display around her home (in custom frames, of course!) When she's not creating content for our brand, she can most likely be found binging shows on Netflix with her two cats.
  • DIY Sports Ribbon Frame

    June 19, 2024

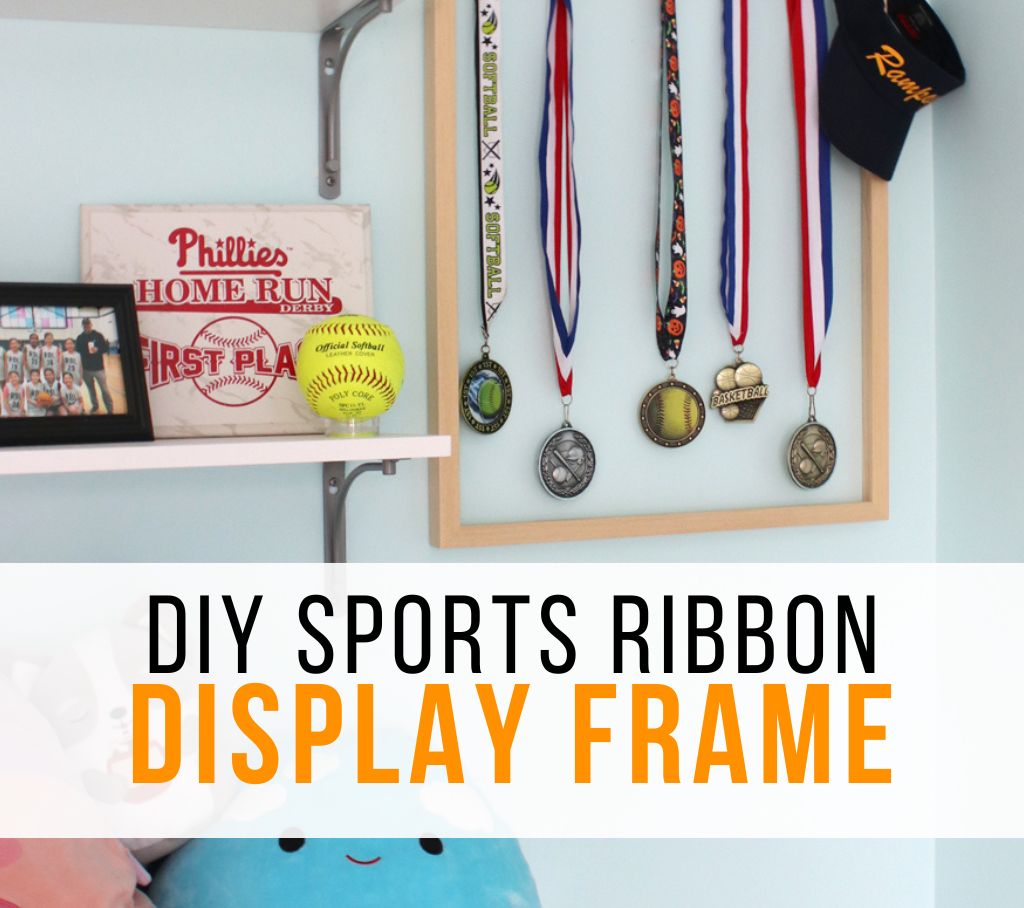
    You’ve spent countless hours practicing drills, drove hundreds of miles to get to games and matches, and sweat and sacrifice resulted in lots of metals and trophies! Don’t stuff your hard earned metals in a drawer or haphazardly sling them on your bed post. Instead, follow this simple DIY to proudly display your precious collection of sports memorabilia! Learn how to turn any frame base into a Hanging Sports Ribbon Frame for your wall.

    sports ribbon frame supplies

    Supplies:

    • 22” x 18” Frame (I used Lindley for this project.)
    • Cup Hooks
    • Drill with small drill bit
    • Pencil
    • Ruler or measuring tape
    • Rubber mallet
    • Hanging Hardware

    metals to frame

    First, collect your ribbons and figure out a rough arrangement on how you’ll hang them on the frame and how long of a frame you’ll need.

    mark your frame for ribbons

    Measure the ribbon widths to get a better idea on how far to space the hooks apart and use a pencil to create marks. We spaced ours 1.5 inches apart.

    ribbon frame DIY

    Add your drill bit to your frame but we have a great tip to lessen the chance of drilling through the frame. Measure the length of the screw part of your cup hook. Apply tape around your drill bit slightly shorter than this length.

    drilling holes for the ribbon frame

    drilling holes in diy frame

    When drilling holes into the frame, only drill up to the tape marking.

    hooks for DIY ribbon frame

    Screw in the cup hooks in these holes.

    diy ribbon frame backing

    Add hanging hardware to the back of your frame.

    Sports Ribbon Frame Display

    Sports Ribbon Frame Display

    DIY Sports Ribbon Display

    DIY ribbon frame display

    Hang your frame in your home. Tip: Due to the extra weight of the metals on this frame, you might to add double hardware pieces on the back or add a more heavy duty security hanger to the back and/or use drywall anchors to help secure it in place.

    sports ribbon display

    display your sports ribbons

    Hang your ribbons on each of the hooks.

    diy sports ribbon display

    diy sports ribbon frame

    sports ribbon display frame

    sports ribbon frame

    display your sports ribbons

    Whether it’s a participation ribbon or one earned after a weeklong tournament, this personal memorabilia can easily be displayed in your home. Display it along with your other sports trophies, gifts or game balls to keep your collection together.

    About The Author

    Tara Nehil Headshot Tara Nehil is author of SpotOfTeaDesigns.com, a lifestyle blog sharing home décor, crafts, party inspiration and parenting lessons learned the hard way. Her graphic design background is evident in the home she lives in and styles with her husband and 2 young daughters. Follow her creative journey for photo tutorials, printables, budget-friendly decorating tips and ways to celebrate occasions big and small.
  • Father's Day Gift Idea: Nuts & Bolts Frame

    May 29, 2024

    You’re about to hear Dad say, “You nailed it!” This Father’s Day, dig through all those jars and drawers in your garage and recycle leftover hardware pieces to create a custom nuts and bolts frame for your dad with a custom mat. Discover our tips to create the perfect arrangement, what adhesive to use and how to ensure this DIY custom matboard fits within your CustomPictureFrames.com frame.

    diy father's day gift supplies

    Supplies:

    • Frame
    • Matboard
    • Miscellaneous hardware
    • Hot Glue or E6000 glue
    • Pencil

    As we previously shared, creating a custom matboard (Link: DIY Custom Matboards) is a great way to personalize a gift, play off a photo’s theme or match your home décor when displayed.

    For this Father’s Day gift, you’ll first need to take note of the area of the frame you have to craft your custom mat board so it fits after completion. Insert your mat and use a pencil to draw a light line noting your workable area.

    create your custom father's day photo mat

    Since these hardware materials are slightly weighty, you may choose a heavier-duty adhesive, like E6000. It comes in smaller tubes like this or larger tubes for bigger projects. Tip: smaller tubes are less likely to get glued shut between projects!

    nuts and bolts frame

    Apply a small amount of glue to each hardware piece and attach it to the matboard. You may consider working in some small areas around the mat or try the approach of adding all the largest pieces first, then filling in with smaller pieces.

    nuts and bolts diy custom matboard

    Whichever you choose, add pieces until they completely fill up the pencil-marked frame.  

    fathers day frame

    fathers day diy gift

    Allow the custom matboard to dry thoroughly before reassembling the frame. Tip: If you choose to hang on the wall, you may consider additional security hardware to make it more stable in your home.

    About The Author

    Tara Nehil Headshot Tara Nehil is author of SpotOfTeaDesigns.com, a lifestyle blog sharing home décor, crafts, party inspiration and parenting lessons learned the hard way. Her graphic design background is evident in the home she lives in and styles with her husband and 2 young daughters. Follow her creative journey for photo tutorials, printables, budget-friendly decorating tips and ways to celebrate occasions big and small.
  • DIY Custom Matboards

    May 22, 2024

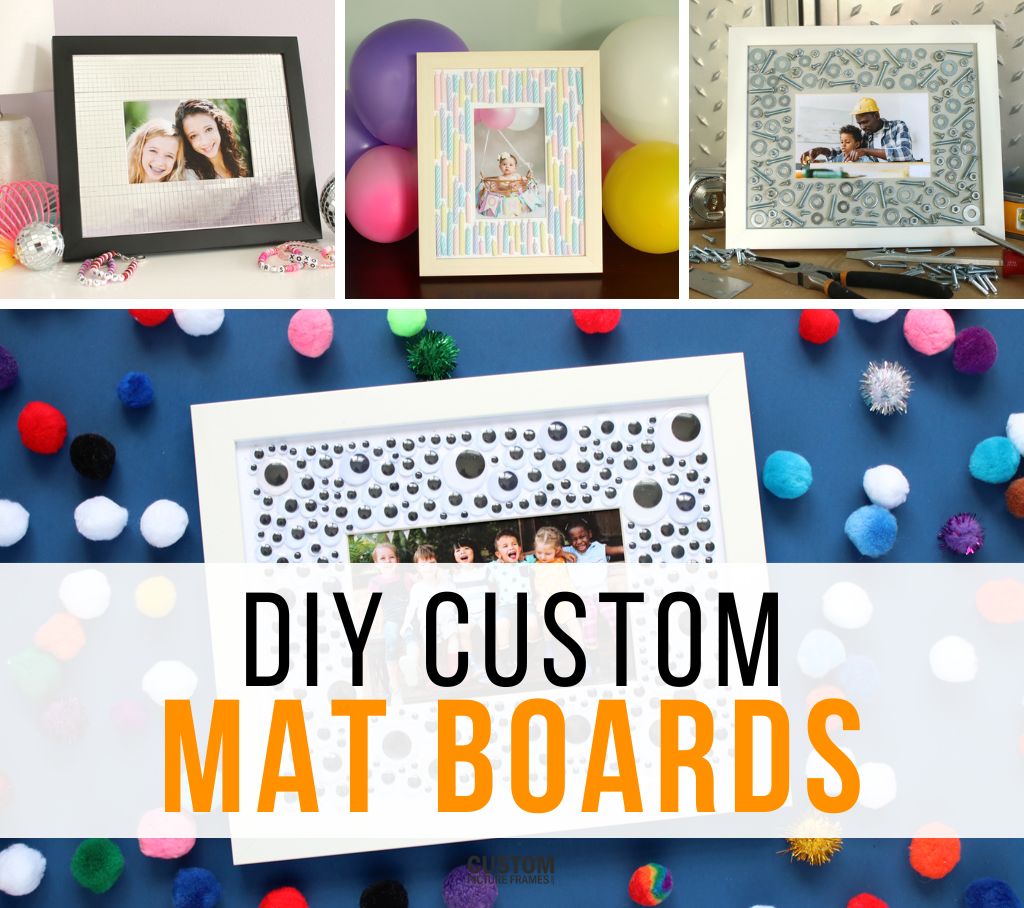
    While there are thousands of custom framing options you can choose to complement your captured memory or memorabilia, sometimes the options are still not enough! Consider creating a custom matboard to match the vibe of your cherished moment in time with personalized accessories outside the framing aisle. Follow along for more tips on upgrading your frame with a custom matboard for birthdays, holidays and special occasion photos.

    MATS

    diy mat boards

    At CustomPictureFrames.com, our matboards are 4-ply and 8-ply thick and come in 85 different colors to fit your needs. Use one of these matboard options as a base for your custom-framed piece. When creating a custom mat board, consider starting with a basic white or black or choosing a color that may help your materials camouflage into the frame.

    diy mirror ball matboard

    In the case of this Swiftie-inspired custom matboard on our Smooth White mat, the matboard color is irrelevant to the finished design as it was covered with these adhesive mirror strips.  

    diy fathers day matboard

    The Grey matboard was a great compliment to the silver hardware used in this Nuts and Bolts Frame.

    ADHESIVES

    diy matboard glue

    custom mat board adhesive

    Consider various adhesive options when crafting your custom mat boards, depending on what you attach. Flatter, thinner materials, like tissue paper, patterned paper or decorative napkins, will easily adhere with decoupage glue. Slightly dimensional items, like the birthday candles, will likely adhere well using basic white tacky glue. Uniquely shaped items, like twigs, may adhere easily with hot glue. Thicker and slightly heavier items, like nuts and bolts, might adhere best using a sturdier, more permanent glue, like E6000. Tip: They sell mini tubes of this glue that lessen the chances of gluing the tube shut after each use!

    TIPS

    mark your mat boards

    • Measure First. There must be a little overlap for the frame to hold in a mat. This may limit the amount of surface area you have to create your custom design, especially when it involves thicker decorating materials. Before working on your custom matboard, insert it and assemble your frame. Use a pencil to lightly mark a line on the matboard so you don’t have a challenge adding the mat back in.
    • Check your weight. Putting too heavy of material on your custom mat board will certainly change the weight and possibly the weight distribution of your frame. Consider this when hanging your frame, as you might need to add extra hardware to secure it to the wall or add weight on the easel back so it doesn’t fall over.

    googly eye mat

    • Make a plan. Your material choice to build your custom mat board may require more planning on the arrangement before gluing, while others are fine to be applied without any planning. In the case of this googly eye frame, the tacky glue we used allowed for slight readjustment as we added the eyes to the frame. Tip: don’t use hot glue with googly eyes; it may melt the eye and limit the googly action!

    To add acrylic or not to add acrylic? This may be one of your questions. Custom matboards with dimensional items may limit your ability to add a protective acrylic piece to the front of the frame. If you still want this dimensional look but with a protected front, consider choosing a shadowbox instead of a picture frame as a house for your custom matboard piece.

    About The Author

    Tara Nehil Headshot Tara Nehil is author of SpotOfTeaDesigns.com, a lifestyle blog sharing home décor, crafts, party inspiration and parenting lessons learned the hard way. Her graphic design background is evident in the home she lives in and styles with her husband and 2 young daughters. Follow her creative journey for photo tutorials, printables, budget-friendly decorating tips and ways to celebrate occasions big and small.
  • How To Mount A Varsity Letter

    May 15, 2024

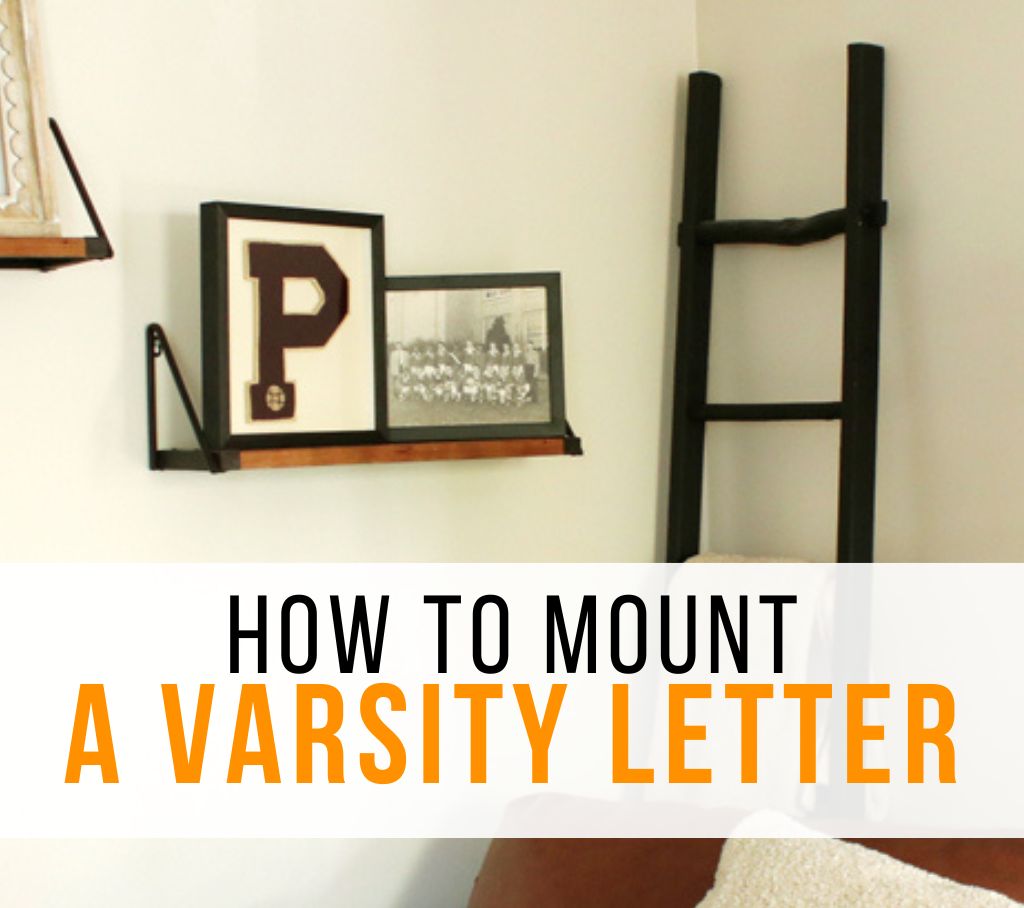
    You may be well past the glory days of being a star player on the varsity team, but the memories of long practice sessions, endless drills and a stacked win/loss record are as strong as ever.  Commemorate those happy days by float mounting your varsity letter in a beautiful shadow box frame in your home. Whether this piece is a family heirloom varsity letter from a grandparent or your own, learn how CustomPictureFrames.com can help protect this important piece of memorabilia with UV-resistant acrylic in their beautiful frames.

    mounting supplies for varsity letter shadow box

    Supplies:

    • Shadow box frame (I used Brindle)
    • Adhesive-backed foam core
    • Straight pins with small heads
    • Craft knife
    • Pencil
    • Ruler

    Sure, you can mount your varsity letter directly onto the backer of your shadow box, but this float mounting technique helps elevate -- literally! -- this displayed look.

    adhering varsity letter in shadow box frame

    Lay the adhesive-backed foam core with the sticky side down (and the adhesive not yet peeled) on top, and lay the varsity letter face down on top. Trace this face-down letter with a pencil.

    Lift the letter and now draw a second shape inside this shape about 1/8” all the way around. This ensures the smaller shape will be hidden behind the varsity letter when mounted.

    foam for float mounting varsity letter

    Use a craft knife (with a fresh blade) and cut out the inner shape drawn on the adhesive foam core.

    pin your varsity letter in shadow box

    Use straight pins to attach the varsity letter to the non-adhesive side of the foam core shape, and do your best to hide the pins behind the letter. This allows you to secure your varsity letter to the foam, but not ruin it with adhesives.

    varsity letter float mounted in frame

    Peel the adhesive backing from the other side of your mounted varsity letter and press down onto your shadowbox backer.

    varsity letter shadow box

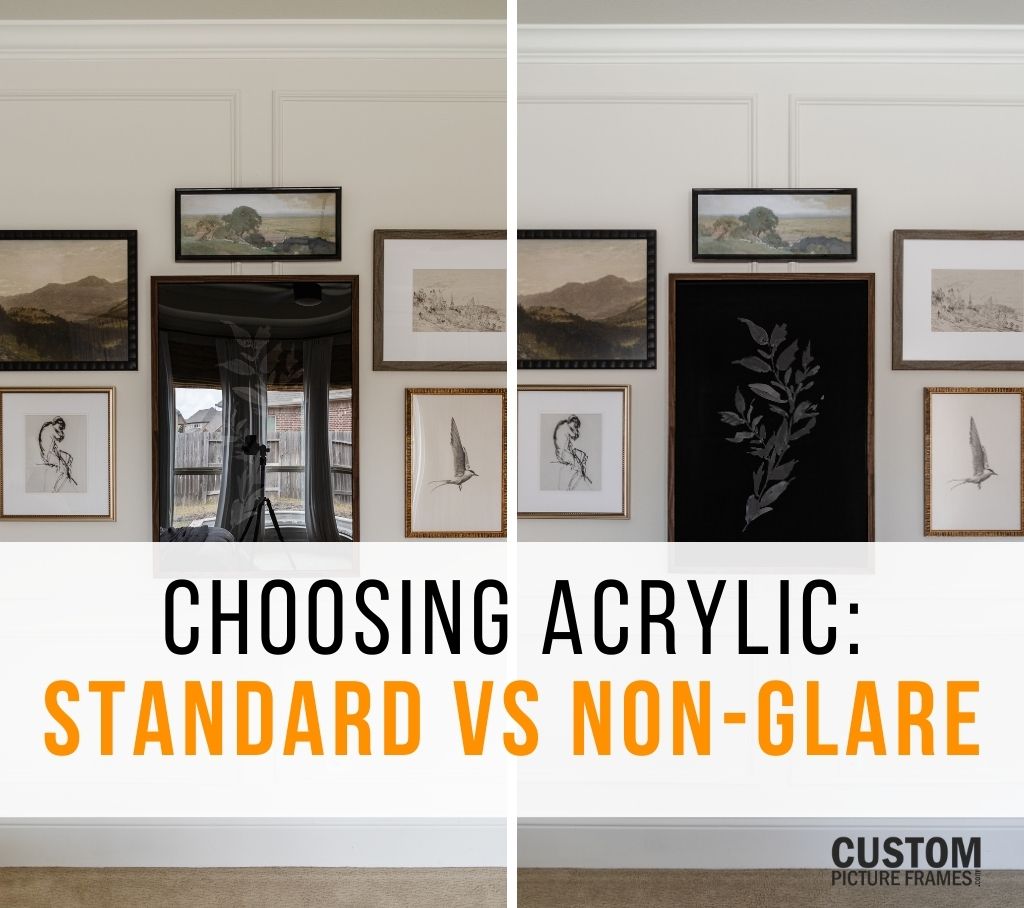
    Assemble your shadow box! Our frame-grade acrylic frame fronts are transparent, lightweight, UV-resistant and shatter-resistant. These are great for beautifully displaying memories and memorabilia while protecting them from dust and UV light.

    varsity letter shadow box display

    float mounted varsity letter

    Add this framed piece of family memorabilia to your home, bringing a piece of history and personality to your walls or shelves.

    About The Author

    Tara Nehil Headshot Tara Nehil is author of SpotOfTeaDesigns.com, a lifestyle blog sharing home décor, crafts, party inspiration and parenting lessons learned the hard way. Her graphic design background is evident in the home she lives in and styles with her husband and 2 young daughters. Follow her creative journey for photo tutorials, printables, budget-friendly decorating tips and ways to celebrate occasions big and small.
More Details
  • Trust Guard - Security Scanned
    Website is Security Scanned Security Scan Passed:
    Scan Frequency:
  • Trust Guard - Malware Scanned
    No Malware Detected Malware Scan Passed:
    Scan Frequency:
  • Trust Guard - SSL Scanned
    Active SSL Certificate Encrypted By:
    Expiration Date: